This tutorial demonstrates how to fake soft shadowes in Max. It differs from the first version in that it just uses one spot light and scene motion blur instead of mulitple spotlights along a helical path. You can download the sample file here.
How To
In the Front view create Circle spline with a radius of 50
In the Top view create a target spot light starting at the center of the circle going up 300 units. Turn on the Shadow Casting.
Back in the front view create a Dummy object centered on the Spot Light emitter and then link the Spot Light emitter to the dummy.
Now assign a Path Controller to the dummy object and use the Circle as the path. Open up the track view and find the Percent Controller and move the last key (it should be frame 100 but will vary to whatever your default time segement) to Frame 1. Open the Curve Out of Range Dialog and assign a Cycle for the in and out type.
Select the Circle spline and assign a Look At Controller to it and have the target be the Spot Light target object.
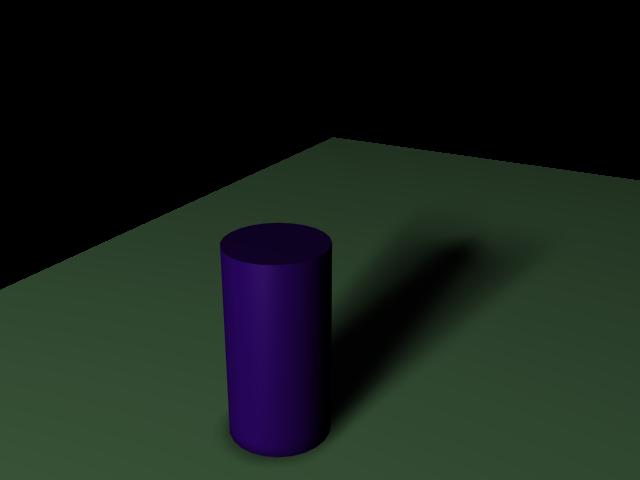
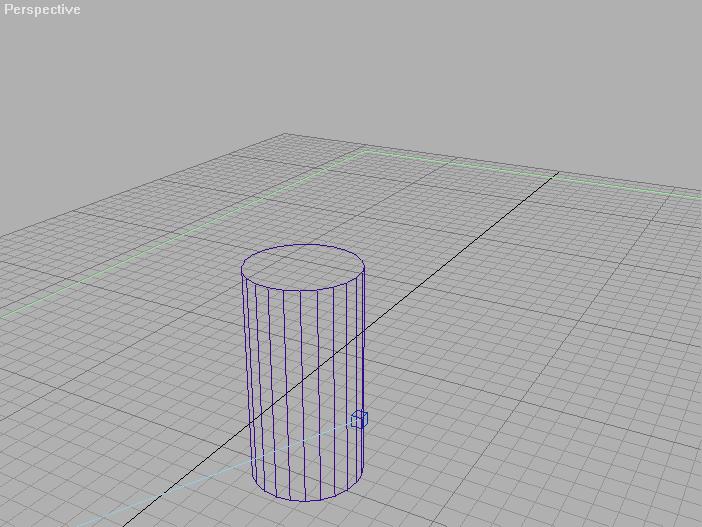
Create some geometry to cast some shadowes. A simple cylinder on a box will do. Now move the Spot Light by moving the Circle spline and the target into a position to cast a shadow.
Now open up the Video Post and create a Scene Event. Double click on it to bring up the Scene properties, turn on the Scene Motion Blur leave the Duration at 0.0, set the Duration Subdivisions to 12, and the Dither to 0. Execute the Video Post and you should have soft shadowes.
You can adjust the quality of the shadow by increasing or decreasing the Duration Subdivisions and adjust the Focus of the shadow by increasing or decreasing the Radius of the Circle spline.